Getting Started
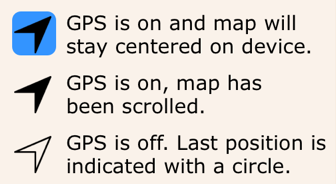
- On the Locate screen, pinch and scroll around on the map or use the locate arrow
 to have GPS find your current location.
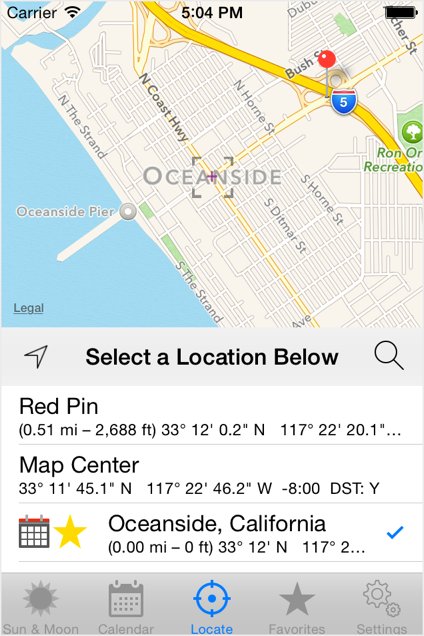
Select your city or the current GPS location from the list. The red calendar icon
  and
check mark
  will indicate which location you have chosen.
- If your city is not in the list, swipe "Map Center"
or one of the closest cities in the table and select "Copy to Fav".
If the locate arrow is solid, tap the GPS arrow until it is hollow (which turns it off) and try swiping again.
On the Favorites screen you can change
the name and coordinates and then select it. The "Sun & Moon" and "Calendar" screens will use the selected location.
- To close the tutorial guides, tap on one of them or the dismiss
 button.
Sun & Moon Screen
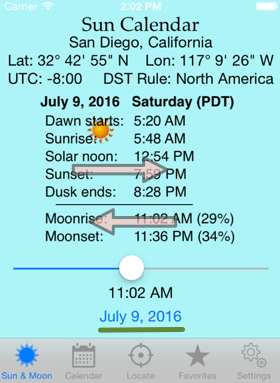
- You can swipe the center area left or right to advance or go back a day.
The date (underlined with green) below the slider is also a button,
tap it to select a new date.
- The acronym in parenthesis is the name of the time zone for that day. It will help in determining if standard time or
daylight saving time (DST) is in effect for that day. For example:
| EST | Eastern Standard Time |
| EDT | Eastern Daylight Time |
| PST | Pacific Standard Time |
| PDT | Pacific Daylight Time |
| WET | Western European Time (winter time) |
| WEST | Western European Summer Time |
| CET | Central European Time (winter time) |
| CEST | Central European Summer Time |
- Use the slider to change the time. When either the date or time is modified, the time beside it will be shown in italics,
meaning that "Track Sun & Moon" is off.
- To turn "Track Sun & Moon" on, select the date button and choose Track Sun & Moon. You can also turn it on in the
Settings screen.
- When "Track Sun & Moon" is on, the screen will show the current date and time (i.e. the local time) for the location
selected and the sun and moon positions. The sun and moon icons will 'track' or traverse the screen individually as time advances naturally,
if the slider is moved, or if the is date changed. These icons show an approximate location for each body if it is above the horizon—they are
not 100% astronomically accurate and although they may appear to predict eclipses, they are not intended to do so.
The times in the table are accurate.
Calendar Screen
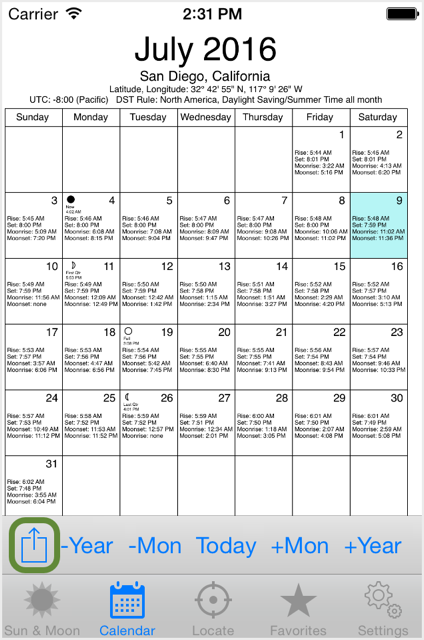
- The calendar will be generated based on the last location you selected on either the Locate or Favorites screen.
The red calendar icon and check mark on those screens will indicate the location used to generate your calendar.
- The action menu button, circled in green (above picture, lower-left area), allows you to print, email, save or copy the calendar.
-
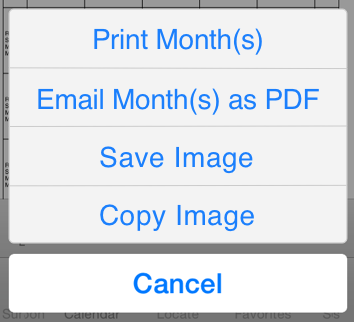
- When you choose to Print or Email the calendar, you will be asked to select the number of months. The app will print or make the .pdf,
starting with the current month on the screen, so that each month is on its own page.
- Save Image will save the month on the screen to Photos (the Photos app, also known as the Camera Roll.)
- Copy Image will copy the month on the screen to the clipboard.
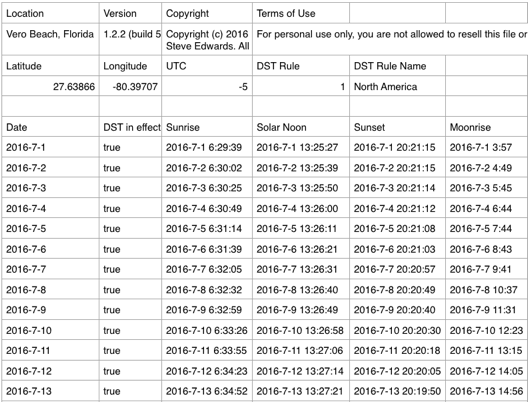
- To get the CSV data, turn on "Attach CSV to Email"
 on the Settings screen, Options area.
Then choose the Email action here,
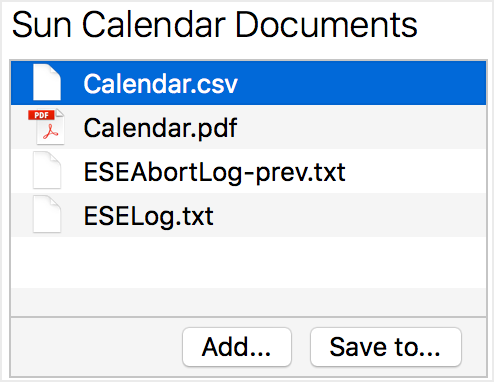
select the number of months desired and email it. The email will have two files attached, a Calendar.pdf for printing and
a Calendar.csv file with all the data for those months.
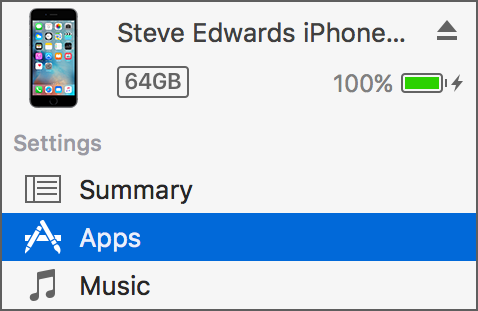
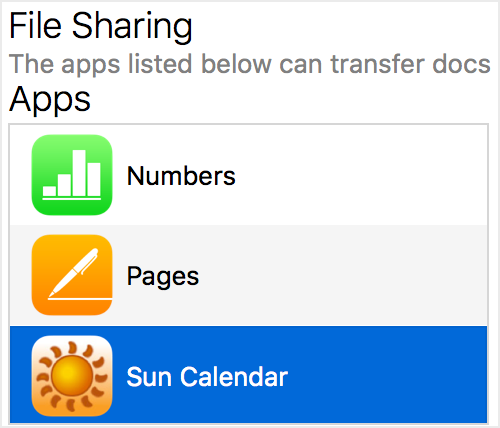
- You can also retrieve the files by attaching your device to a computer running iTunes. See iTunes Shared Folder.
Generate the files by selecting Email (set the CSV option On if you want that file too), once
the email app is shown, they are available in the shared folder.
You can "Send" or choose "Delete Draft" in the email app.
Locate Screen
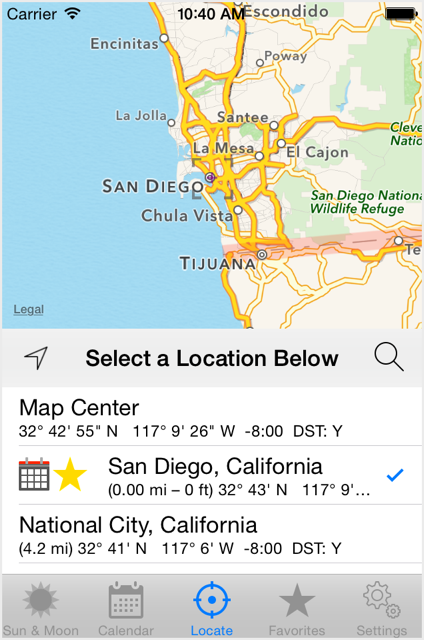
- Scroll around and zoom in and out on the map to find the location you are interested in and tap on it in the list—you can also choose the Map Center row.
It will be selected and moved to the top of the list, as this table
is sorted in ascending order by distance, closest to the map center.
- A red calendar icon
 and
check mark
  will be shown next to your selection designating that it will be used to make your calendar.
- The DST texts, "DST: Y" and "DST: N", indicate if the location observes DST rules. A 'Y' means that it may change its clocks to observe DST if the rules
say so—the app automatically adjusts the times for those days.
Click "Visit DST page" to see the rules used by this app. A 'N' means that location will never and has never observed DST.
- You can set a city to be a favorite—they will be shown with
a
 yellow star.
Favorites will always show up in this list, sorted by distance with the other locations.
|
Example: Making a Favorite
Suppose you live near Oceanside, California and want to make it a favorite.
Move the map to Oceanside.
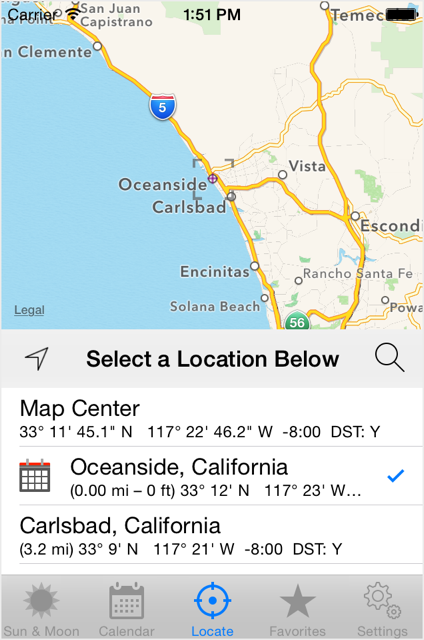
Swipe that row (when GPS is off) and tap "Copy to Fav" to copy it to your favorites list.
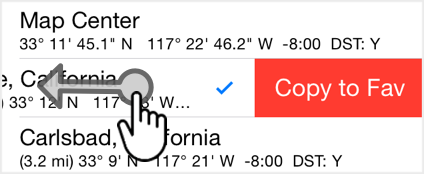
You can now leave it as a favorite, or on the Favorites screen you can rename it and edit its latitude, longitude, and time zone.
Note: If you edit a predefined location you will get a copy of that location, so it is helpful to give it a new name to distinguish it from the original.
|
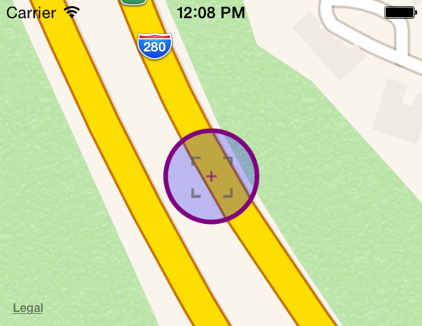
- If the location that interests you is not in the list, center it in the map. Turn on the Reticle (a switch on the Settings screen)
to help you find the center of the map. The time zone and DST of the row "Map Center" will be determined by the closest location found.
Swipe the row "Map Center", select "Copy to Fav", and then edit the name and other data on the Favorites screen.
Locate Screen — GPS
Locate Screen — Search
- The Search
 text area,
or the Search icon (the magnifying glass)
  on the iPhone,
will allow you to enter search terms.
An Internet connection is required to use this feature—the search is sent to Apple servers
that search their database.
- Search terms can be:
- City or town
- State or 2-letter abbreviation
- Province
- Country name, 2-letter or 3-letter abbreviation (e.g. za, fi, jp, can)
- U.S. zip code or other postal codes
- Major airport codes (e.g. bru, lga, nrt, lim)
- To help narrow your search, center and size the map onto the believed region of the location.
The search will use that area first, then it will expand its search to the rest of the world.
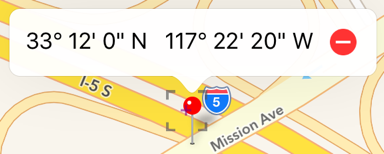
Locate Screen — Red Pin
Favorites Screen
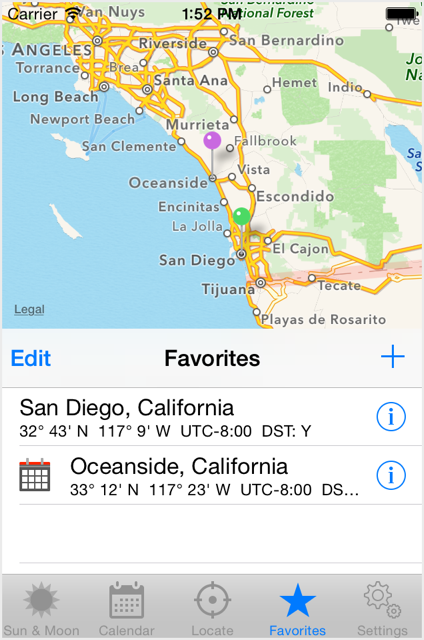
- A new or selected location will be marked on the map with a purple pin. Other favorites (up to 50) will be shown as green pins.
- To move the purple pin, press-and-hold on the map at the new location—don't try to drag the pin. Tap Save to save your changes.
- To change the order of the favorites, tap the Edit button and move them around by dragging
this
 icon. Click Done when finished.
- To delete a favorite location, swipe that row and select Delete.
-
To add a new favorite, tap the + button in the center bar (top bar on iPad). The app will create a new favorite location and
pin it in the center of the map. The time zone and DST rule will be set
based on a nearby city found in the database.
If there is no nearby city, it will choose a time zone based on the longitude and set the DST to none.
You must verify that the time zone and DST rule settings are correct (for iPhone:
click the circled i
 to go to the Detail screen).
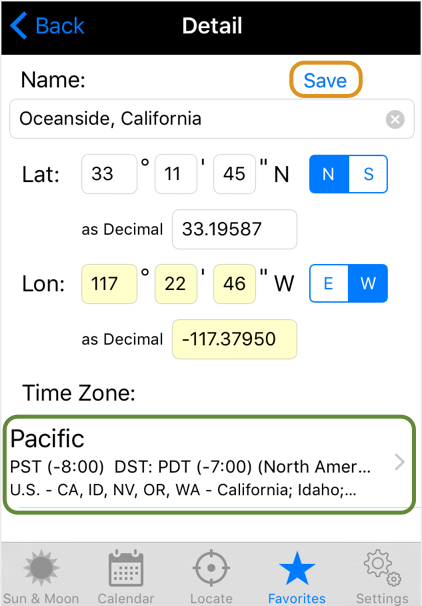
- Use the entry fields to enter a new name or new latitude and longitude coordinates.
You can enter data using degrees, minutes, seconds or the decimal field—updates will be shown immediately in the other fields.
Tap N or S, E or W to set those, respectively.
Invalid entries will be highlighted in red and should be corrected before saving.
Latitudes cannot be higher than 84°.
- Tap the Time Zone button (above picture, circled in green) to select a new time zone and DST rule.
- Modifications will be highlighted in light-yellow indicating that you need to save the changes. Click Save (above picture, circled in orange).
- If you edit a predefined location you will get a copy of that location, so it is helpful to give it a new name to distinguish
it from the original.
- For iPhone: You can move the purple pin on the map, press-and-hold on the map at the new location. Click Save in the upper-right of the map when
you want to set the new coordinates:
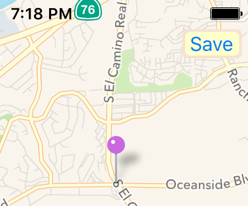
Or, use the Detail screen to update the latitude and/or longitude.
After saving on the Detail screen, tap the Back button to see the new placement of the purple pin.
Settings Screen
- The optional field "Default Email" is not transmitted to any server on the Internet—it will be used to fill in the 'To:' address in the standard Apple iOS
email program. It is only used as a default when you choose to email your calendars. See the Privacy Policy page.
- When turning on "Larger Font Size on Calendar", don't select too many options or the app will be forced to make the font size
small in order to fit all the text in the box. Some labels will be abbreviated, such as Moonrise will be abbreviated to Mrise, to allow
for a very large font size. You should also choose a short time format, either 24-hour or "a/p, no space".
General
iTunes Shared Folder
This app uses a shared folder on this iPhone, iPad or iPod Touch that is accessible from a computer running the iTunes application.
This folder stores the Calendar.pdf, Calendar.csv and log files. To access these files:
You can add files to this folder, but please don't—the app is not expecting any new files there.
You can delete any of these files (the app will recreate them as needed), but it is not recommended.
You may delete the file ESEAbortLog.txt if the app keeps asking you to delete it.
Email support for more information.
Credits
- For information on books, video lectures, graphics, etc., that were used, please visit the Support Website.


